Wednesday, July 11, 2012

Anna Maria Horner for a Quarter!!

Seeing the beautifully arranged stacks of quilting fabrics many bloggers have in their sewing rooms usually makes me green with envy.  Don’t get me wrong, I have lots and lots of fabric.  Most of it is upholstery weight from my stint as a tote bag and purse designer/maker about 6 or 7 years ago.  I also have plenty of fashion fabrics just waiting to become something spectacular, but I have never had any of those fun, trendy modern quilting fabrics. 
That ended the other day when I had one of those magical visits to Fabric World.  Yes, Fabric World has reopened after their big sell off of $5 bolts I posted about last summer.  Now they sell just whatever they get shipped.  Mostly it is remnants – beautiful high end remnants.
A few weeks ago I went with a gift card in hand.  (Gift cards are the best because they leave no paper trail when buying fabric.)  I knew they were selling these unbelievable remnants for $2 a yard and I have been playing around with a few ideas for a new product to sell.  I planned carefully and knew what I wanted to get – if they had it. 
When I got there, the signs had been changed:
Up to 8 inches – 25 cents
9-35 inches – 50 cents
36 inches or more – 2 dollars
There were almost a dozen extra long tables to dig through.  At these prices I wished I’d brought a snack because I knew this was going to be a long morning.  I loaded up my cart.  Some of my “remnants” were 4 yards long – that is only 50 cents a yard for high end linen!  I was doing my best to use self –control but these fabrics were lovely!
I rolled my heavily laden cart over to the measuring table to start narrowing it down when the announcement came – I hope you are sitting down because your knees might just go weak when you read this – “ALL REMNANTS 25 CENTS!”  It gives me goose bumps just to type that!  I instantly went into Rambo mode.  I rolled my cart to the cutting table where they were counting and bagging the fabrics.  3 trash bags of fabric for $29!  I ran them to my van and headed back in.
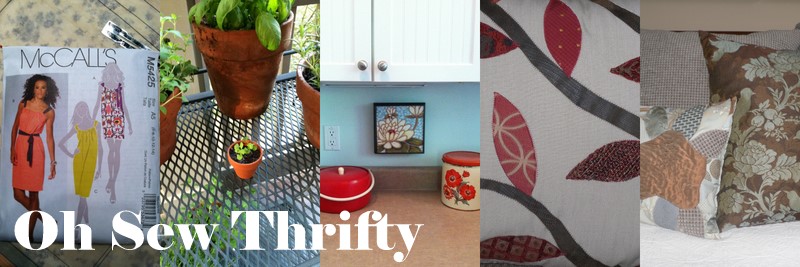
As I said I have always wanted a quilting stash and mixed in with the home dec fabrics were Westminster Fibers fabrics.  Names like Anna Maria Horner and many others were right at my fingertips.  So with my empty cart I started to fill it with quilting fabrics.  This is my new stash!  Less than $25!!

And this is the sign that greeted me when I walked in the door!

DISCLAIMER!!
If you live anywhere near Fabric World you must know that they shipped all unsold Westminster Fabrics to (sniff) a rag factory.  I've been back twice since this event.  They had New York fashion fabrics - $3 a yard along with paintings for $25 and the next time gorgeous home dec remnants for $4 a yard and curtain panel samples from Walmart for 25 cents each.  You just don't know what you will find each time you go.  It is always an adventure!

Tuesday, June 12, 2012

Back to Blogging


When I take an accidental hiatus from my blog I feel like the return post must be substantial.  Unfortunately, I keep thinking of things I would love to blog about, but they do not fill the proverbial bill.  So I have decided to jump right back in and not worry if my first few posts are less then spectacular.

So, what have I been up to?

My blogging break originally started when work on the spring play at my children’s school and an event I was planning for our church both struck at once.  I suddenly didn’t have enough time to do anything well, so I focused on those two events.   My family had to eat takeout or cook for themselves.  My house fell to ruins before my eyes.  My pantry quickly emptied and my laundry chute was overflowing.  Soon the piles of laundry spread throughout the house – both clean and dirty.  The basement was covered with pattern pieces, stray pins, and fabric scraps.  My orchid died of neglect - only I didn’t even notice for about another month!

When things get that out of balance, I think the universe is trying to tell you something.  And this time I listened.  I was offered a volunteer position with a lot of responsibility.  It is one of those jobs that requires staying on top of everything (obviously not my strong suit), soothing parents (yikes!), recognizing all the subtle and not so subtle politics involved within any organization (I am so naïve – I only see these things in hindsight) and being able to speak in front of large groups (another weakness, which is why I joined Toastmasters – another story for another day.)  All in all, I knew this job would challenge me to be someone I am not so, I actually said no.

And then something amazing happened - I said no again.  I resigned my position as the email coordinator for my daughter’s grade.  I was in my 5th year in this position and as busy as I get during a play, I needed to let this go as well.  And if I am asked to do something else at church, I have confidence that my answer will be, “I’d rather not.”  I only have 2 years left of being a stay at home mom.  When both my children are attending college, I won’t be staying at home anymore.  With only 2 years left, I want to focus on family.  Lesson learned.

Sunday, March 11, 2012

Another Great Find Under $1

I am starting a short series of thrifty finds.  Enjoy!!

50 cents!


If you look carefully at the cover of this book you will see the 50 cent price tag.  This book was tucked away at the Friends of the Library monthly sale.  There are 48 pages of alphabets and fun stitching motifs.  There is very little instruction, which is fine since I have no idea what language it is printed in.  If you know, please pass on any knowledge you have of what it says!

Friday, March 9, 2012

New Sewing Machine


Recently, I spent the day driving from one sewing machine dealer to another with my friend Tracey as she researched the latest "super machines".  I told my husband when he left for work that morning that I would try not to get sewing machine fever while we were out.  The real machines were tempting, but I could not pass up this $7 beauty at The Classy Flea.  I wish I could have waited until he got home so I could have seen his face when I told him I bought a new sewing machine!  Just the sound of his voice over the phone was worth the $7 investment.


Thursday, March 8, 2012

Possibly My Best find Yet!!

20 Cents!!
That's right.  I paid 20 cents for this hand painted plate at Value Village today.  You can't see it in the picture but that is metallic gold paint.  I Googled Georges Briard and he popped right up.  His handpainted plates sold in Nieman Marcus and Bonwit Teller in the 50's, 60's and 70's.  I am guessing that this plate was part of a store display.  Georges Briard was the name artist Jascha Brojdo signed on the back of his commercial products. Jascha served on the staff of Gen. George S. Patton as an Army interpreter.  Does anyone else wonder if this was a tribute to the General?  Hard to believe it is just a coincidence.

Wednesday, March 7, 2012

Crazy Quilting

Does this fabric look familiar?  These are the fabrics from my nephew's quilt.  My friend Tracey came over the other day to teach me how to crazy quilt.  We were going to practice with random scraps when she had the brainstorm to use the leftovers from the quilt.  I have a couple of mistakes that I will not point out but am curious if you notice.  I was able to take this square in the car and actually embroider while riding.  I normally cannot do anything in the car, but this I could do!  Very exciting to have something to take along in the car.


I also took along the book on the right, Complete Guide to Embroidery Stitches.  This book is checked out from the library. (I love the public library!)  I put this book on my Christmas list but was dismayed to find that it is out of print.  The least expensive copy I could find was almost $100.  It immediately came off my list.  But I was able to check it out again to take with me on our trip. 

 I added some embroidery in classic crazy quilt style to the square above.  It was a great way to pass the time.  I will make it into a pillow to send with the quilt - when I finish it!

Tuesday, February 21, 2012

Project Update and Questions - Help!

I've been quilting with my walking foot inside the edge of each block and  outside the edge of each circle.  I am 80% finished with the border.  I have two questions - well many questions but I will keep it to two!
1.  How do I hide the ends of my thread when my quilting does not go off the edge of the quilt?
2.  Where do you start when you are filling in the background of the quilt?  Quilting the field of the quilt is the part I have been the most nervous about.  I am planning to either stipple it or do swirly lines that make circles.  These were both taught in my class in October.

Any help is greatly appreciated!

Tuesday, February 14, 2012

First Quilt - I Need to Get Busy Quilting!

Quilt Front
This is my very first quilt!  I had hoped to give it to my nephew on his second birthday.  He turned 3 last week!  He loves anything with wheels or any type of ball he can throw so it is designed with circles (balls) and vehicle fabrics.  I've been struggling with each step because I don't want to ruin it.  I've come to the realization that if I don't hurry, he will outgrow the fabric before I get it to him. 

I took a quilting class at the Quilt Expo this fall and then posted about practicing my free motion quilting.  I've been busy with costumes for the high school, making my daughter's dress, and all kinds of projects that distract me from finishing.  I decided that this will be my next project once I finish my son's sweater throw.  (It is embarrassing to admit I started buying sweaters before I bought this quilt fabric.  First time projects intimidate me!)

Quilt Back
I used my Sidewinder Bobbin Winder to load some bobbins today in an effort to try to get ready to quilt.  (I had 10 minutes to be creative today!) I am just going to have to give it a go.  The thing is, he won't care one bit if I do a good job so I just need to get busy and get to it!

Putting it out there that I have this project that needs to be finished ASAP will hopefully make me accountable!  Let's see if it works!

Sunday, February 12, 2012

My Fall Project - No Time To Post!

My daughter had a dance the first week in December.  We started shopping in early November and hoped we would get as lucky as we did last year.  Unfortunately, we found nothing!  We even started shopping in the $250 range in pure desperation.  If you know me well, you know that is way out of my comfort zone!  We still did not find anything appropriate.

On a lark, I went to Hancock fabrics during one of their $.99 pattern sales to see if there was an easy pattern that would look well on her.  I found one that seemed to be exactly what she was looking for.  It lets you design your own dress by choosing from the different options.


My daughter loved the pattern - but a different view!  I liked this one.


She picked the bodice that had no room for error on the fit. 


And she wanted only one layer of fabric on the bodice instead of just sewing two layers together and turning them right side out as the pattern called for.  So not only did I have to fit the bodice just right, figure out how to change the construction,  then I had to trim the single layer of chiffon in satin bias tape! 

After four bodice cuttings, sweating over inserting a zipper into a skirt and bodice that had 2 layers of fabric  (chiffon over satin), using boning for the first time, and completely cutting out the skirt twice because the first one was way too short, this is the final result:

Getting ready for the dance at her grandmother's house.

She felt beautiful and I was so relieved she liked the dress.   And best of all, she had a great time at the dance!

PS - Total cost of the dress - $27.00.  Her fabric was on clearance - $2.00 a yard.  Had I not purchased a lot of extra fabric, it would have been a lot less.  But thank goodness I did!  It was considered a fall color and they were already putting out the brights for New Year's and prom! 


Saturday, February 11, 2012

Progress!

Felted Sweater Throw Update


In quilting blogs I've read about the importance of checking your color combinations by taking a picture.  I am so glad I did!  The throw definitely needed more orange.  I thought I didn't have any pieces big enough so I decided to sew some orange scraps together.  Instead I was able to cut two very narrow strips.  I added those, mixed it up some more and was ready to pin it all together. 

Overlapping the edges 1/2 inch in what Betz White describes in her book, Warm Fuzzies, in a "shingle" technique took some time. (The pieces are all lapped in one direction and then reversed for the next strip. When sewing the strips together, they are lapped in the same direction.)  Being precise was important so I couldn't eyeball it as I usually do.

Using my 1/4 inch foot, I sewed the pieces together.  This left a 1/4 seam allowance on both sides of the throw. 

I've been studying on this throw for a long time and have read at least three books on recycling sweaters.  One book insisted that stabilizer is necessary for sewing the sweaters together without stretching them out of shape.  I have to admit there is a little bit a waviness to some of the seams, but I just didn't want to go the expense (hence the thrifty in Oh Sew Thrifty) or to the trouble to remove the stabilizer later.  I think it looks fine.


Next I will clip my threads, even up the edges and decide how to embellish it.  This is for my 17 year old son, so nothing fancy.  The throw in Warm Fuzzies has ribbed edging on the ends only.  (It mimics fringe.)  Or maybe a blanket stitch all the way around the edge instead?  And/or a monogram since I hope he will be taking it to college someday?

Any suggestions?

Monday, February 6, 2012

Reality Check!

Day 1  Ready for accessories.

Day 1 of actual use! 


I imagined that I would add baskets, great lamps, and a nice rug. In the end I thought I would have a nice place for my children to study. It is really no different than before - only better furniture!

I will not quit! We will find some great ways for them to organize their space. When they go off to college they will have roommates so they need to learn to pick up after themselves. This is one of the first rooms you see when you enter my home, so I really do need some cooperation - or a big screen!

IKEA Tables - Surprise!

After shopping all day, Tracey and I settled on these IKEA kitchen tables to use as desks.  They were too country for the IKEA chairs, but when we found these wicker chairs at Ballard Designs we knew we had a good fit.  Because it was the very end of the day we rushed back to IKEA expecting to pick up the two tables and head out. 

To pick up your furniture at IKEA you have to find it in the self serve furniture area.  Everything is organized by Aisles and then Bins.  To add to our confusion the bin numbers were missing on this aisle.  Luckily we had the item number as well so we were able to confirm we had the right table even though - Surprise! - it came with 4 chairs!  Then the dilemma, what to do with the unexpected chairs?  Final decision - college table and chairs for my children's first apartment or if needed extra chairs for parties.  Either way, the chairs were an unexpected bonus.  Which just confirms, Tracey and I have incredible luck when we shop together!

Wednesday, February 1, 2012

Dynamic Duo Strikes Again!

Everyone need a wonderful good luck charm to shop with!  I have my friend, Tracey.  Not only do we have a blast together, but we always manage to find the most incredible bargains or one-of-a-kind treasures.  We go to estate sales, thrift stores, consignment stores and flea markets.  Tracey is always game for whatever adventure I dig up and vice versa.  I should do a post to show you some of our best finds!

Yesterday we spent the whole day looking for furniture for my former parlor - soon to be study hall.  We found a pair of black wicker chairs at Ballard Backroom.  Not only were they exactly what I was looking for, but they were also on sale.  Originally $400 a pair, I got them for only $125 incl. tax.

Yes, it is so warm on the first of February that my doors were open!

They are perfect for the IKEA tables we found.  More on the tables tomorrow.

Do you have a shopping buddy that you always have fun/luck with?  I hope so!

Tuesday, January 31, 2012

New Decorating Project in the Works!


This is what my kids have done to my parlor!  This is actually their picked up for company version.  My husband and I decided no more computers upstairs so they have camped out in my never quite finished parlor.  It is truly a shame because they both have desks upstairs, but too much Facebook and Netflix and not enough studying was going on.

To make room for them, we moved a leaf green chaise into our master.  If you go to my first post you will see that this does not really go with my color scheme, but I will work it out.  There was also a huge highboy in the parlor that never really fit.  I didn't know where to put it when the movers were here and I loved the linen storage it provided.  We moved it up to the guest room - quite the operation - and it looks great.  The secretary that was in the guest room is now in the hall and it looks a little homier up there now.  So far a win- kind of win.

And this is the parlor now.  A blank slate for what I hope will become a comfortable and motivating place for my children to study.

Monday, January 30, 2012

You have to Love Free!

Our public library had an overflowing free cart the other day.  Anything the Friends of the Library feels is out of date or not high enough quality for their sale they put by the door and give it away.  I just liked the look of this old dictionary and thought it would look great on a shelf.  Who can resist Brain Games - especially when they promise to lower my brain age!  (The book has never been used but the back cover is ripped.)  And best of all is Recipes From Reba.  I opened it up to Garlic Croutons and thought, "This is going home with me!"

There were a lot of great Christmas decorations on my favorite blogs that use pages from old books.  Check with your local library and see what they do with donations to their book sales that are not up to their standards.  You might snag some free supplies for those awesome paper trees, wreathes and ornaments!

Thursday, January 26, 2012

Meat and Cheese Waffles - A Family Favorite!


Instant Dinner!

Meat and Cheese Waffle, Apple Butter, Cantaloupe, and Strawberries
These are a family favorite and perfect when comfort food is a must.  All you do is add shredded sharp cheddar cheese and ... secret ingredient ...
Armor Dried Beef to your waffle batter. 

I use Reduced Fat Bisquick as my waffle batter base.  Once the waffle batter is mixed, I add 1 to 1 1/2 cups of shredded sharp cheddar cheese.  Then I add 1/2 of a jar of dried beef if it is the size pictured or a full jar of their smaller size.  Before adding the dried beef you must rinse it then pat it dry.  I cut it into fourths, stack them and then cut into small strips.  It is salty even after rinsing so smaller strips are better.   I usually serve meat and cheese waffles with scrambled eggs and apple butter instead of syrup.  If we are feeling pretty decadent we will have Stouffer's Harvest Apples on top of the waffles.  (If you like sweet and salty, maple syrup is incredible on these waffles if you don't mind the sugar.)  Fresh fruit makes a nice side. 

ENJOY!!


Monday, January 23, 2012

Felted Sweater Throw - Uhoh!

Trial and Error    See how twisted - Yikes!
This is going to drive me crazy!!  I thought I was ready to start cutting the sweaters into squares but I was so terribly wrong.  I was going to leave the ribbing on the sleeves and the large pieces and then arrange them so that they gave the throw a nice ribbed border that I would not have to add at the end.

What I did not realize was the pull of the ribbing until I tried to cut my squares.
I experimented with a moth eaten sleeve (top).  It is only a few inches wide but the ribbing is already twisting.  The whole throw will be wonky if I don't trim off the ribbing.  This means I have to redo all my math since the squares will now be different sizes! 

Do you have any advice?

Back to the drawing board - literally!


Sunday, January 22, 2012

Finally Getting Started


Warm Fuzzies by Betz White was tops on my Christmas list this year.  I've been collecting sweaters and felting them for over a year.  My collection became quite extensive but I did not have the confidence to start cutting the sweaters.  Were they felted enough?  Where should I cut them?  This book answered most of my questions and gave me the confidence to start cutting.


I bought these sweaters with a throw for my son's room in mind.  They all came from a single visit to Goodwill and all were 1/2 price - a very lucky day!  I like the combination of greens (there are two sage greens that look gray in the picture) and blues mixed with a hint of brown, red and orange.  I am following the directions for the rustic throw minus the leaf motif.  The sweaters are cut apart and ready to be cut into squares.

I'll keep you posted!     

Saturday, January 21, 2012

Journal Cover

Today I took a setting intentions workshop.  It ended with decorating a journal where we will record our intentions and break them down into smaller steps.  I have some fun ones that I will share with you soon.  I didn't finish, but this is my journal so far.  It needs shapes cut from old book pages or something random.  Right now it is too ordered for me - not personal enough.  I am trying not to let it bother me that after I already glued down the paper, I decided to change the orientation from landscape to portrait.  The pattern is going in the "wrong" direction!  Maybe it needs some funky numbers - 2012 - or a special quote.  What do you think?

Friday, January 20, 2012

I Think This Says it All!

My daughter handed me this note the other day.  She tore it out of one of her journals.  Apparently I must have been modeling for her how to write in a journal - a long time ago. It is definitely my handwriting and I think it describes me to a T!

Sunday, January 15, 2012

Super Quick Pillow Sham Tutorial


You can make this pillow sham in an hour or less.  How long it takes depends on how much time you spend  centering the pattern or matching stripes from front to back.  The sewing is quick and easy!

You will need:

48 inches of fabric (if a solid)
For patterned fabric allow extra fabric to match the design front to back (especially plaids) or to allow you to play with the placement of the pattern on your sham.  It is always nice to center the largest part of the design in the center of the sham.  If your fabric is really expensive, I would use it only for the front and use a coordinating, less expensive fabric for the back.

Coordinating thread for topstitching the sham 

Cut your fabric:

                1 rectangle 30 ½ by 24 for the front

                1 rectangle 14 ½ by 24 for the smaller back flap

                1 rectangle 23 by 24 for the other back flap

1.      Determine the inside edges of your flaps by laying your two back flaps side by side (matching the 24 inch sides) with both patterns laying in the same direction.  Put a pin in each of the two sides that are touching.  These are now your inside edges.
        Finish the inside edge of the back flaps with a double folded hem – approx. ¼ and another  ¼  inch. I just eyeball it.


2.       Lay the sham front right side up.  Lay the larger back flap right side down matching the raw edge to the outside edge of the front piece.


3.       Lay the smaller back flap right side down matching the raw edge to the outside edge of the pillow front and overlapping the inside edge of the other flap.


4.       Pin around the entire perimeter of the pillow sham.  Sew a ½ inch seam all the way around.

5.       Turn right side out.  Press. 


6.   Topstitch 2 ¼ inches from the edge all the way around the sham.  Make sure you backstitch over the edges of the flaps to reinforce those seams as you work your way around the pillow sham. 


7.       Stuff with a standard sized pillow. (I used a Laura Ashley pillow from Tuesday Morning in the example - great place to buy pillows.)   It looks a little tight now but the pillows are brand new and I bought really puffy ones.  Shortly they will look just right.
I made two of these shams for my mother's guest room.  It is amazing what a difference they make!