Tuesday, January 31, 2012

New Decorating Project in the Works!


This is what my kids have done to my parlor!  This is actually their picked up for company version.  My husband and I decided no more computers upstairs so they have camped out in my never quite finished parlor.  It is truly a shame because they both have desks upstairs, but too much Facebook and Netflix and not enough studying was going on.

To make room for them, we moved a leaf green chaise into our master.  If you go to my first post you will see that this does not really go with my color scheme, but I will work it out.  There was also a huge highboy in the parlor that never really fit.  I didn't know where to put it when the movers were here and I loved the linen storage it provided.  We moved it up to the guest room - quite the operation - and it looks great.  The secretary that was in the guest room is now in the hall and it looks a little homier up there now.  So far a win- kind of win.

And this is the parlor now.  A blank slate for what I hope will become a comfortable and motivating place for my children to study.

Monday, January 30, 2012

You have to Love Free!

Our public library had an overflowing free cart the other day.  Anything the Friends of the Library feels is out of date or not high enough quality for their sale they put by the door and give it away.  I just liked the look of this old dictionary and thought it would look great on a shelf.  Who can resist Brain Games - especially when they promise to lower my brain age!  (The book has never been used but the back cover is ripped.)  And best of all is Recipes From Reba.  I opened it up to Garlic Croutons and thought, "This is going home with me!"

There were a lot of great Christmas decorations on my favorite blogs that use pages from old books.  Check with your local library and see what they do with donations to their book sales that are not up to their standards.  You might snag some free supplies for those awesome paper trees, wreathes and ornaments!

Thursday, January 26, 2012

Meat and Cheese Waffles - A Family Favorite!


Instant Dinner!

Meat and Cheese Waffle, Apple Butter, Cantaloupe, and Strawberries
These are a family favorite and perfect when comfort food is a must.  All you do is add shredded sharp cheddar cheese and ... secret ingredient ...
Armor Dried Beef to your waffle batter. 

I use Reduced Fat Bisquick as my waffle batter base.  Once the waffle batter is mixed, I add 1 to 1 1/2 cups of shredded sharp cheddar cheese.  Then I add 1/2 of a jar of dried beef if it is the size pictured or a full jar of their smaller size.  Before adding the dried beef you must rinse it then pat it dry.  I cut it into fourths, stack them and then cut into small strips.  It is salty even after rinsing so smaller strips are better.   I usually serve meat and cheese waffles with scrambled eggs and apple butter instead of syrup.  If we are feeling pretty decadent we will have Stouffer's Harvest Apples on top of the waffles.  (If you like sweet and salty, maple syrup is incredible on these waffles if you don't mind the sugar.)  Fresh fruit makes a nice side. 

ENJOY!!


Monday, January 23, 2012

Felted Sweater Throw - Uhoh!

Trial and Error    See how twisted - Yikes!
This is going to drive me crazy!!  I thought I was ready to start cutting the sweaters into squares but I was so terribly wrong.  I was going to leave the ribbing on the sleeves and the large pieces and then arrange them so that they gave the throw a nice ribbed border that I would not have to add at the end.

What I did not realize was the pull of the ribbing until I tried to cut my squares.
I experimented with a moth eaten sleeve (top).  It is only a few inches wide but the ribbing is already twisting.  The whole throw will be wonky if I don't trim off the ribbing.  This means I have to redo all my math since the squares will now be different sizes! 

Do you have any advice?

Back to the drawing board - literally!


Sunday, January 22, 2012

Finally Getting Started


Warm Fuzzies by Betz White was tops on my Christmas list this year.  I've been collecting sweaters and felting them for over a year.  My collection became quite extensive but I did not have the confidence to start cutting the sweaters.  Were they felted enough?  Where should I cut them?  This book answered most of my questions and gave me the confidence to start cutting.


I bought these sweaters with a throw for my son's room in mind.  They all came from a single visit to Goodwill and all were 1/2 price - a very lucky day!  I like the combination of greens (there are two sage greens that look gray in the picture) and blues mixed with a hint of brown, red and orange.  I am following the directions for the rustic throw minus the leaf motif.  The sweaters are cut apart and ready to be cut into squares.

I'll keep you posted!     

Saturday, January 21, 2012

Journal Cover

Today I took a setting intentions workshop.  It ended with decorating a journal where we will record our intentions and break them down into smaller steps.  I have some fun ones that I will share with you soon.  I didn't finish, but this is my journal so far.  It needs shapes cut from old book pages or something random.  Right now it is too ordered for me - not personal enough.  I am trying not to let it bother me that after I already glued down the paper, I decided to change the orientation from landscape to portrait.  The pattern is going in the "wrong" direction!  Maybe it needs some funky numbers - 2012 - or a special quote.  What do you think?

Friday, January 20, 2012

I Think This Says it All!

My daughter handed me this note the other day.  She tore it out of one of her journals.  Apparently I must have been modeling for her how to write in a journal - a long time ago. It is definitely my handwriting and I think it describes me to a T!

Sunday, January 15, 2012

Super Quick Pillow Sham Tutorial


You can make this pillow sham in an hour or less.  How long it takes depends on how much time you spend  centering the pattern or matching stripes from front to back.  The sewing is quick and easy!

You will need:

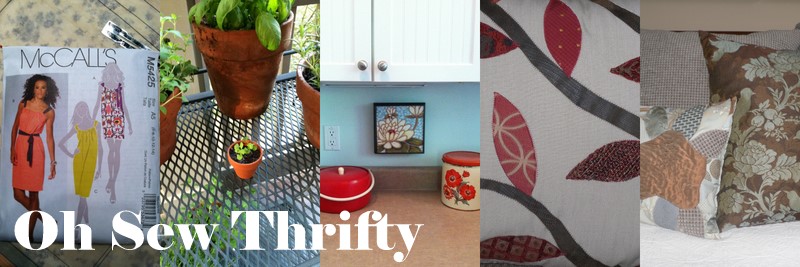
48 inches of fabric (if a solid)
For patterned fabric allow extra fabric to match the design front to back (especially plaids) or to allow you to play with the placement of the pattern on your sham.  It is always nice to center the largest part of the design in the center of the sham.  If your fabric is really expensive, I would use it only for the front and use a coordinating, less expensive fabric for the back.

Coordinating thread for topstitching the sham 

Cut your fabric:

                1 rectangle 30 ½ by 24 for the front

                1 rectangle 14 ½ by 24 for the smaller back flap

                1 rectangle 23 by 24 for the other back flap

1.      Determine the inside edges of your flaps by laying your two back flaps side by side (matching the 24 inch sides) with both patterns laying in the same direction.  Put a pin in each of the two sides that are touching.  These are now your inside edges.
        Finish the inside edge of the back flaps with a double folded hem – approx. ¼ and another  ¼  inch. I just eyeball it.


2.       Lay the sham front right side up.  Lay the larger back flap right side down matching the raw edge to the outside edge of the front piece.


3.       Lay the smaller back flap right side down matching the raw edge to the outside edge of the pillow front and overlapping the inside edge of the other flap.


4.       Pin around the entire perimeter of the pillow sham.  Sew a ½ inch seam all the way around.

5.       Turn right side out.  Press. 


6.   Topstitch 2 ¼ inches from the edge all the way around the sham.  Make sure you backstitch over the edges of the flaps to reinforce those seams as you work your way around the pillow sham. 


7.       Stuff with a standard sized pillow. (I used a Laura Ashley pillow from Tuesday Morning in the example - great place to buy pillows.)   It looks a little tight now but the pillows are brand new and I bought really puffy ones.  Shortly they will look just right.
I made two of these shams for my mother's guest room.  It is amazing what a difference they make!